A lot of Windows 10 users have experienced a frustrating issue — they cannot delete the files or folders on their Windows 10 computers. Some may see an error like folder in use or no permissions, but for others nothing shows up.
In fact, there are some effective fixes for this issue. Here we have compiled a list of solutions to your cannot delete folders problems. Take a look at them below and see if they can help you.
Restart your Windows computer
This is the first thing you can try. Just restart your computer to fix the temporary issues that cause your cannot delete folders issue. If they can help you, great! But if not, then try the fixes below!
Change your folder permission
If you see an Access Denied or no permission error when deleting your folders, you can try changing their permissions. Here is how:
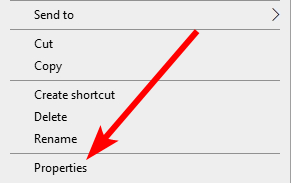
Step 1: Right click the folder you want to delete and select Properties.
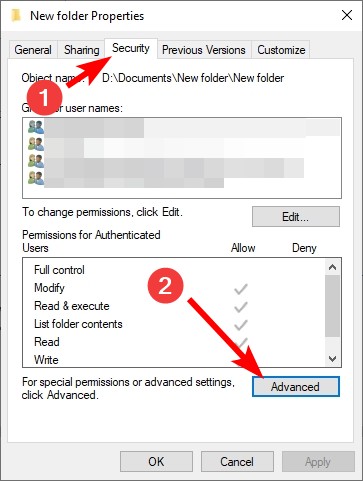
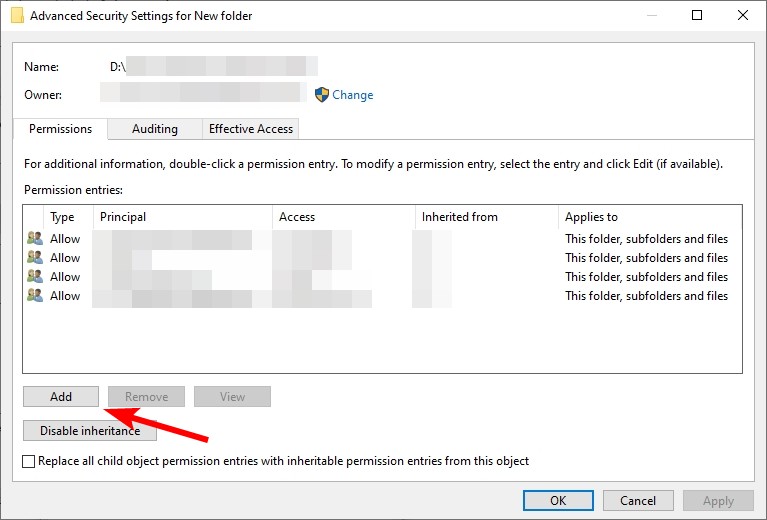
Step 2: Select the Security tab and click Advanced.
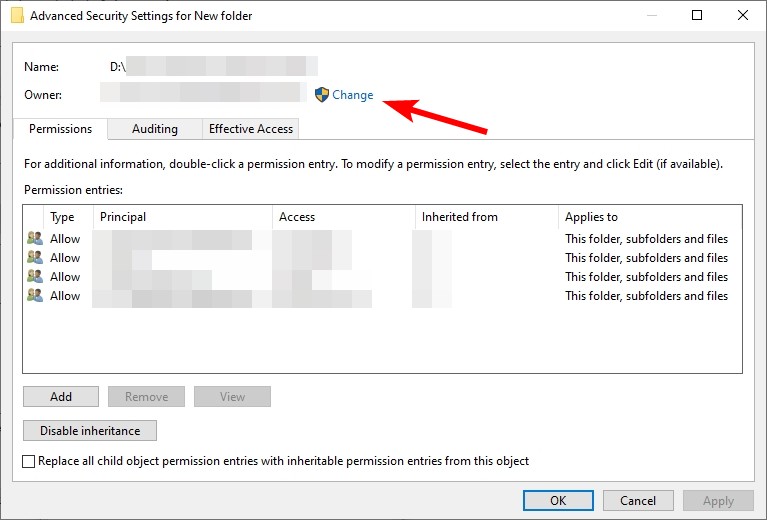
Step 3: Click Change.
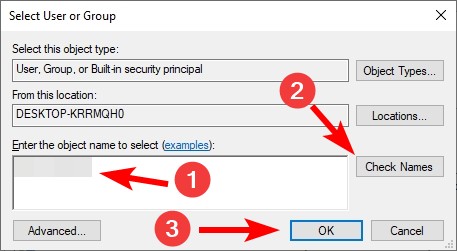
Step 4: Enter your name on this computer, click Check Names, and then click OK.
Step 5: Click the Add button.
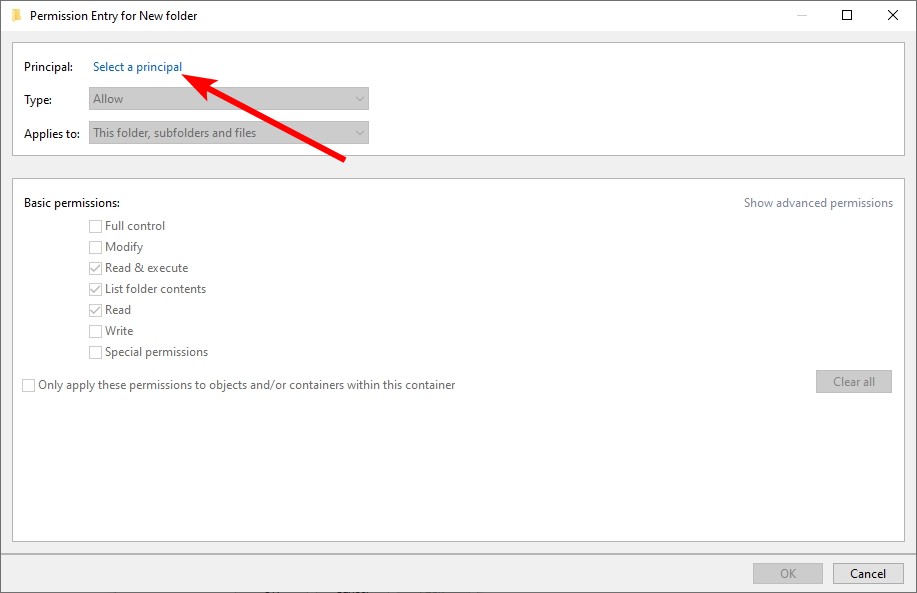
Step 6: Click Select a principal.
Step 7: Enter your name on this computer, click Check Names, and then click OK.

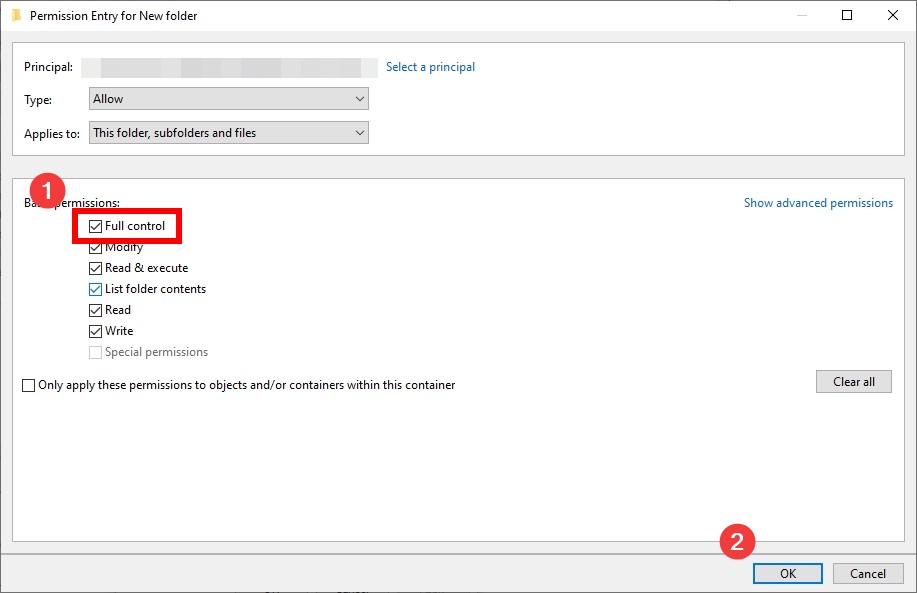
Step 8: Select Full control and then click OK.
Step 9: Check Replace all child object permission entries… and then click OK.
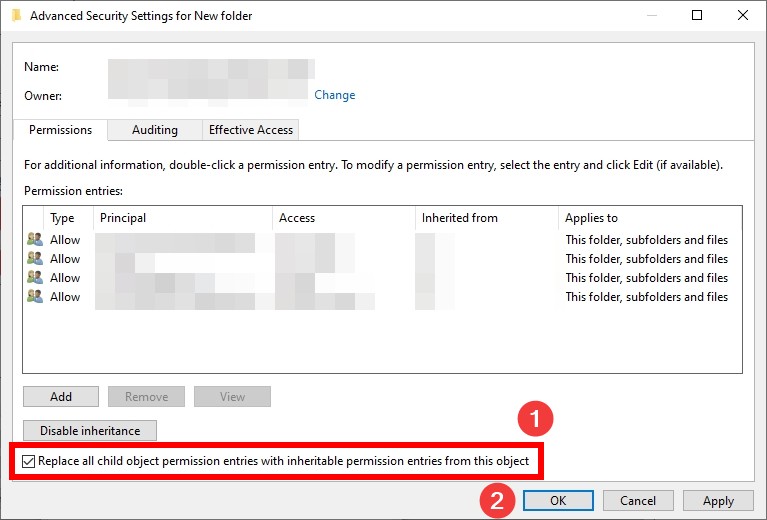
Step 10: Click OK and see if you’re now able to delete this folder.
Use a third-party folder remover
You can try using a third-party cleaner utility to force remove your folder.
The program we recommend is CCleaner. It is a well-known cleaner that has been used by a lot of people. It can free up hard drive space, clear your online tracks and helps you optimize your machine so it runs faster.
To use CCleaner to remove your folder:
Note that you need to upgrade to its Professional version to be able to remove custom files or folders.
Step 1: Download and install CCleaner on your computer. Then run the program.
Step 2: Click Options on the left side.

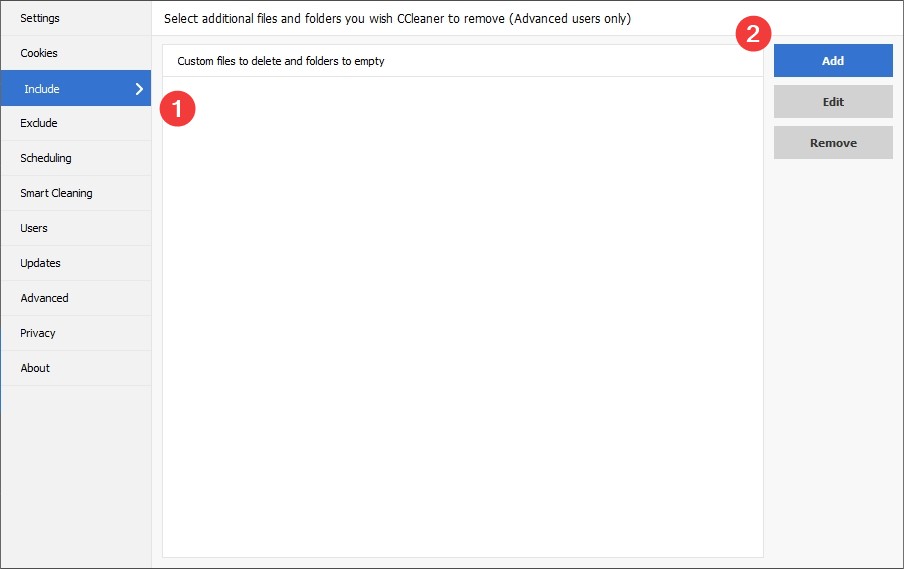
Step 3: Select Include, then click Add.
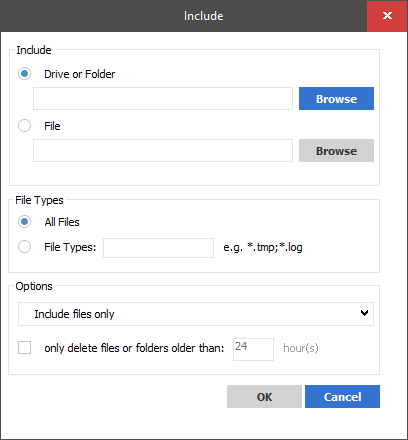
Step 4: Choose the file and folder you want to clean, and select the cleaning options you want. Then click OK.
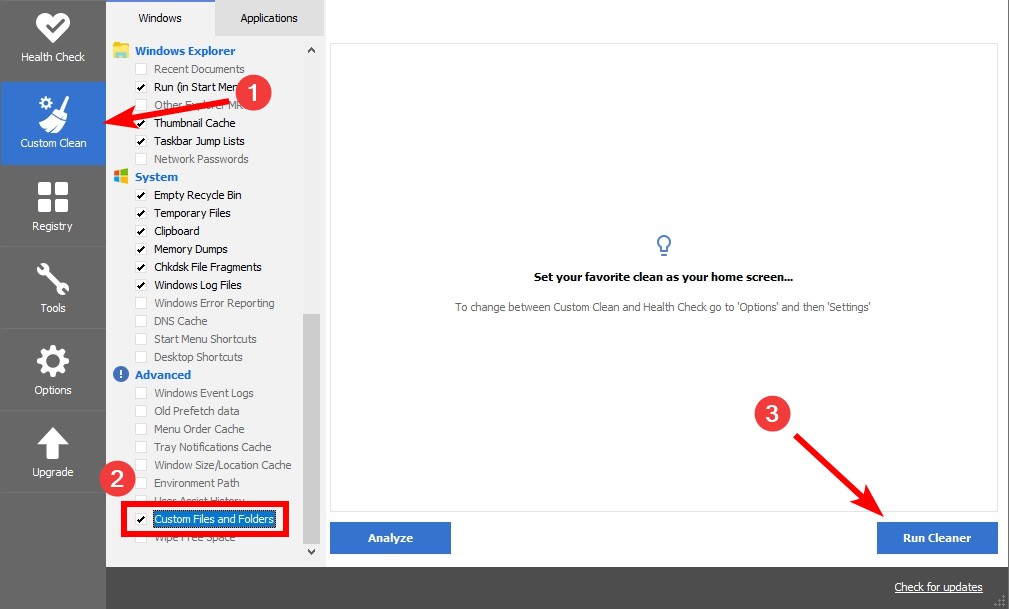
Step 5: Select Custom Clean, then check Custom Files and Folders, and click Run Cleaner.
Hopefully this will help you remove your folder.