Your Destiny 2 game crashes on launch? This is a very common issue that has caused the game unplayable for a lot of players. But don’t worry! Here are some effective solutions to this problem. Just take a look at the list below!
Change your Cyberpunk 2077 compatibility settings
Step 1: Go to where your Cyberpunk 2077 is installed
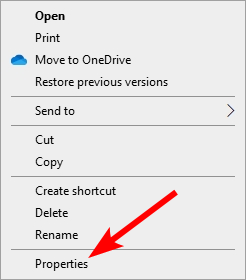
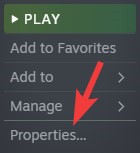
Step 2: Right click your game icon and select Properties.
Step 3: Go to the Compatibility tab, and check Disable full screen optimizations and Run this program as an administrator.

Step 4: Click the Change high DPI settings below.
Step 5: Check Override high DPI scaling behavior. Then select Scaling performed by Application.
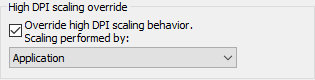
Step 5: Click OK and click OK.
Step 6: Launch Cyberpunk 2077 and see if this fixes your game crashing issue.
Verify your game files
Step 1: Go to your Steam Library.
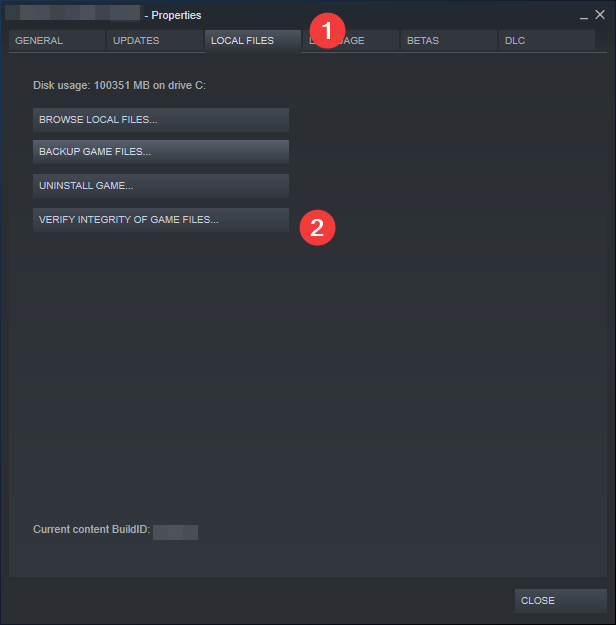
Step 2: Right click Cyberpunk 2077. Select Properties.
Step 3: Select LOCAL FILES, and then click VERIFY INTEGRITY OF GAME FILES…
Now run your game and test your Cyberpunk 2077 crashing issue.
Reinstall your graphics driver
Perhaps your Cyberpunk 2077 crashing issue is due to the problem graphics driver. To fix it, you should try clean uninstalling the driver. You can do this by using Display Driver Uninstaller (DDU, a utility used for clean uninstalling your graphics driver). Download and install this program, then follow its instructions to uninstall your graphics driver.
Once the driver is uninstalled, you should reinstall it. You can use Device Manager on your Windows system, or go to your hardware manufacturer website to find the correct driver manually. Either way, you should make sure the driver you get is correct and up to date.
Or you can use a driver updater. This is a more convenient option — it only takes a few mouse clicks to update a driver! The driver updater we recommend is DriverMax, because it’s powerful and easy to use, and you can use it to update drivers for free!
To use DriverMax to update your graphics driver:
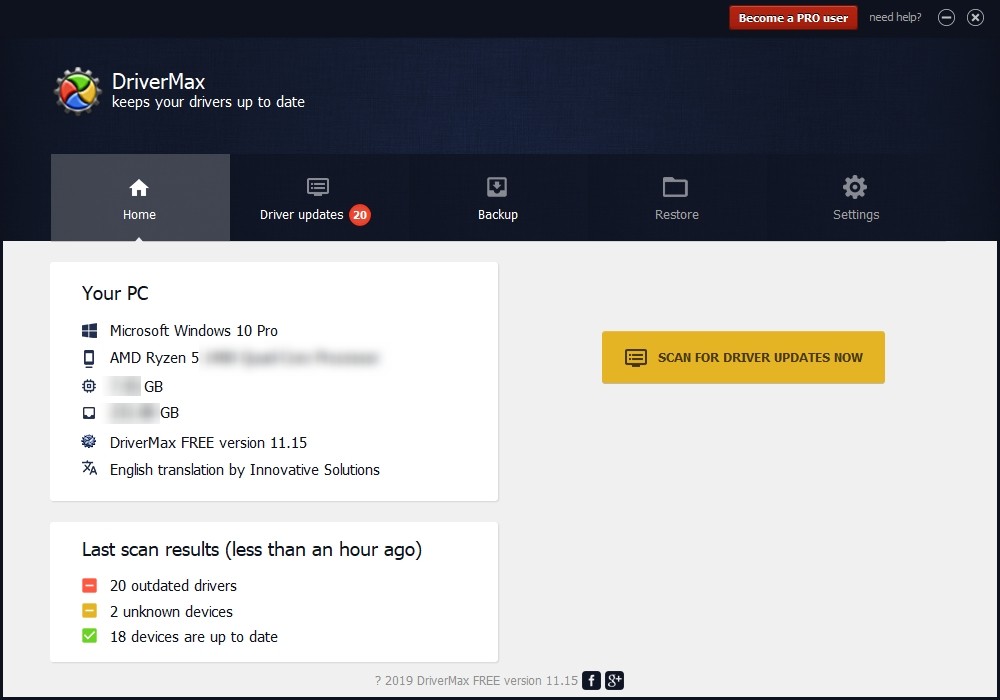
Step 1: Download DriverMax and install it on your computer.
Step 2: Launch DriverMax, and scan for driver updates.
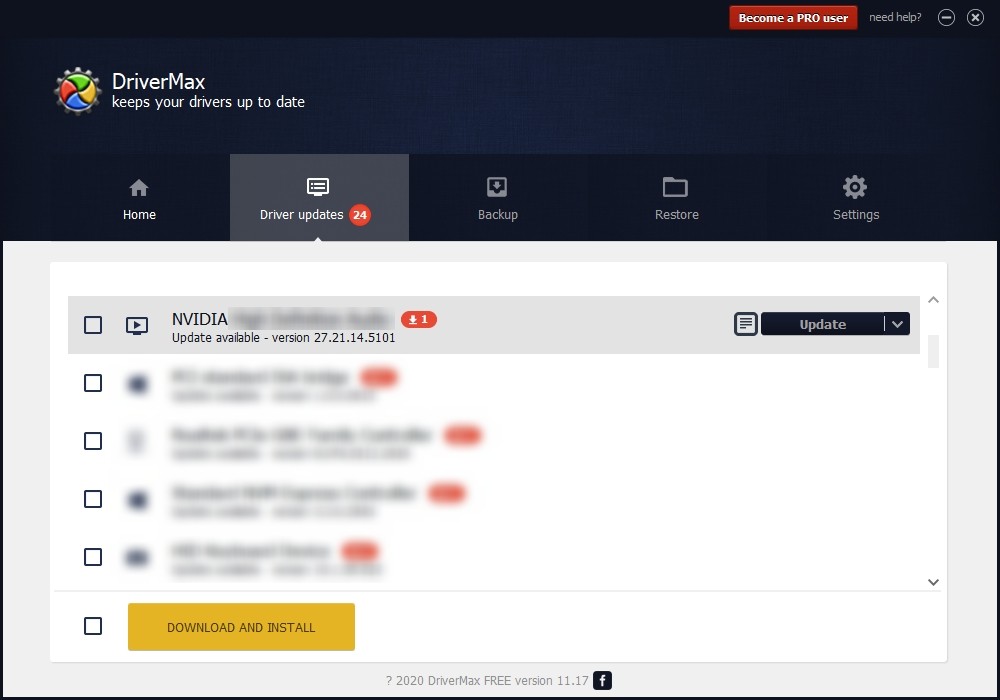
Step 3: Update your drivers (click the update button next to a driver listed).
That’s it! That’s how you can update a driver with DriverMax.
Has any of these fixes worked for you? Or do you have any other effective solutions? Tell us by leaving a comment below!