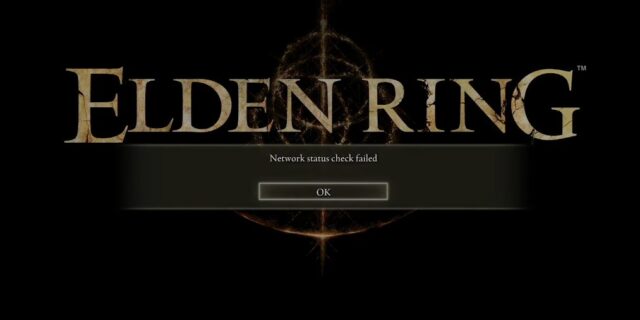
It can be very annoying when you’re experiencing the “Network status check failed!” error on Elden Ring. But don’t worry! In this article, we will give you an extensive list of possible fixes for this issue, and each of them will be explained in a detailed and clear way. We hope that by following these fixes, you’re able to resolve the Elden Ring network status check failed problem, easily!
Check the network you’re using
Your network may be the cause of your Elden Ring network status check failed issue. To troubleshoot it, there are a few things you can do:
- Restart your network devices (router and modem) and computers.
- Try connecting to the Internet via your mobile devices as a hotspot.
- Try using network cable to connect to Internet if you’re using a wireless connection.
If you find any issues with your network connection during these processes, you may need to contact your Internet service provider for assistance.
Check the Elden Ring server status
Your Elden Ring network status check failed may occur because because their servers are down. To check if this is the case, you can visit the official Elden Ring twitter profile and see if they have tweet anything about their server status:
If you find any server issues there, then you need to wait until they fix their servers, then check to see if your problem is gone. If not, don’t worry! There are still other fixes for you to try…
Check your firewall or antivirus
Another thing you can check is your firewall settings. You need to check if your antivirus program or firewall is blocking Elden Ring. If it is, then you need to trying disabling the antivirus program temporarily (be careful for what you’re browsing when it’s off), and see if this can fix your Elden Ring network status check failed issue.
If turning off the firewall or antivirus really works, then you should contact the vender of the software to see what they can do for you. But if not, then move on to the fixes below.
Check your DNS settings
Your network status check failed problem can occur because your DNS settings are not properly configured. To check them:
Step 1: Press the Win and R keys on your keyboard at the same time to launch the Run dialog.
Step 2: Type “ncpa.cpl” and press Enter on your keyboard.
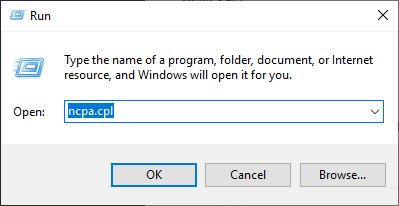
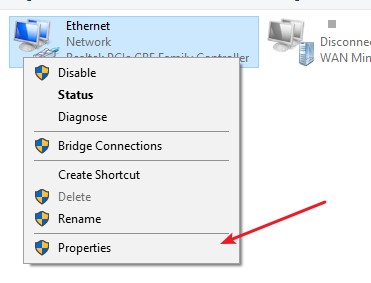
Step 3: Right click your network connection (“Ethernet” for wired connection, and “Wi-Fi” for wireless), and select Properties.
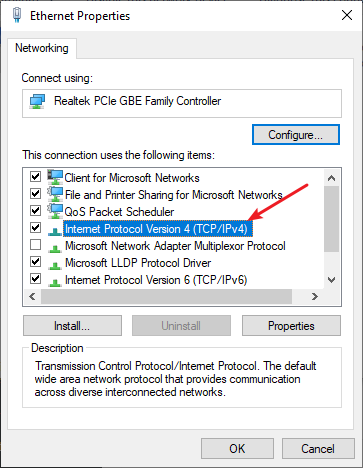
Step 4: Double click Internet Protocol Version 4(TCP/IPv4).
Step 5: Make sure Obtain an IP address automatically and Obtain DNS server address automatically are selected, then click OK. (If they already are then skip this step and go to step 7.)
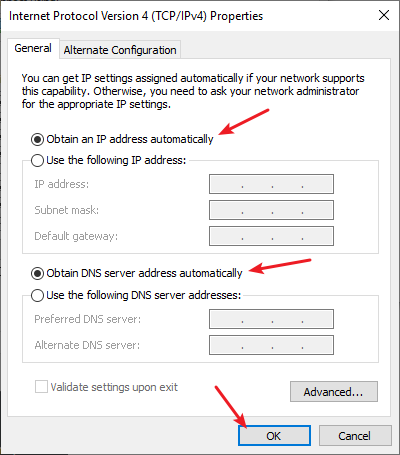
Step 6: Check if this fixes your error. If not move on to the step below.
Step 7: Select Use the following DNS server addresses, then set the server addresses to the Google public DNS server addresses (8.8.8.8 / 8.8.4.4).
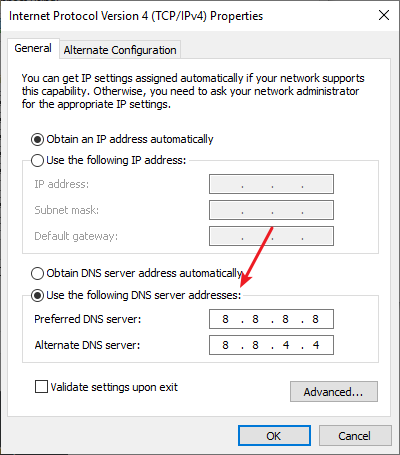
Step 8: Click OK.
Now check to see if this resolves your Elden Ring network status check failed problem.
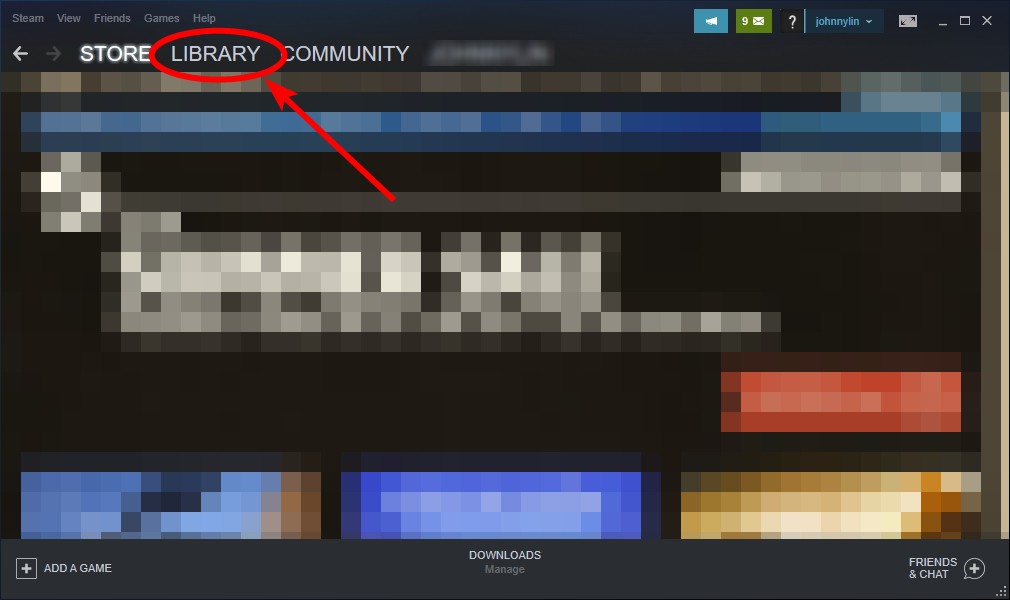
Verify the game files of Elden Ring
This verify the integrity of your Elden Ring game files and fix any corruption issue that may cause the network status check failed error.
Step 1: On your Steam client, click LIBRARY.
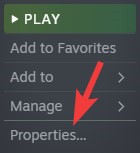
Step 2: Right click your game. Then select Properties.
Step 3: Select LOCAL FILES, and then click Verify integrity of game files…
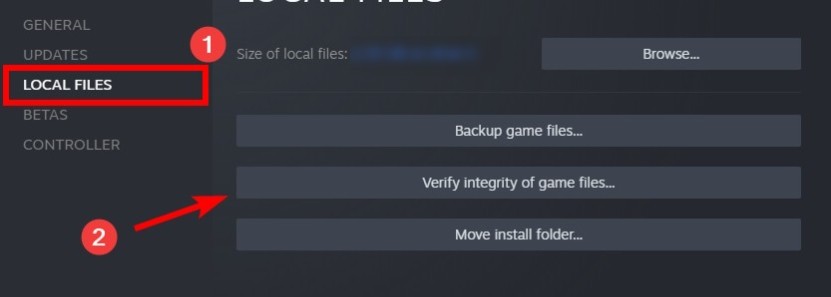
Now open your Elden Ring game and test to see if this fixed the error.
Use a VPN
It’s possible that your Elden Ring network status check failed error occurs because there are interruptions to your Elden Ring connection. And connecting through a VPN can help you get around them.
Using a VPN usually requires some time and computer skills. If you want an easier option, you should try a VPN service. And we recommend using NordVPN.
NordVPN is an easy-to-use and fast VPN service. You’ll be able to set up a VPN connection with just a few mouse-clicks. And its fast speed servers at multiple locations offers you a comfortable and reliable experience.
To use NordVPN on your computer:
Step 1: Download and install NordVPN on your computer.
Step 2: Run NordVPN and sign in your account.
Step 3: Click the Connect switch. This will automatically connect you to the VPN server recommended for your device.
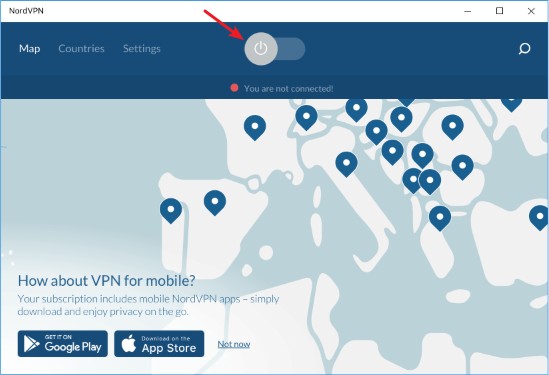
Now your VPN connection is set up, and you can see if this works to fix your Elden Ring network status check failed issue.
Reset your Windows network settings
It’s possible that the cause of your Elden Ring network status check failed problem is on your Windows IP and DNS settings. You can try resetting them and see if this works.
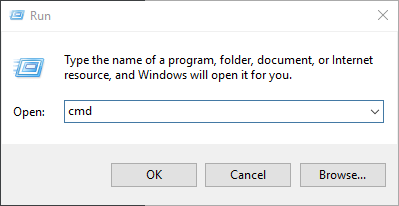
Step 1: Press and the Win and R keys on your keyboard to launch the Run box.
Step 2: Type “cmd” and press Ctrl, Shift and Enter on your keyboard. This will run Command Prompt as Adminstrator.
Step 3:
In Command Prompt, enter the following commands:
ipconfig /flushdns
ipconfig /renew
ipconfig /registerdns
Step 4: Close the window and restart your computer. Then test your Elden Ring network status check failed issue.
Has any of the fixes above worked for you? Or do you have any other effective ways to fix the Elden Ring network status check failed issue? Tell us by leaving a comment below!