For some Monster Hunter: World gamers on PC, there is an issue that keeps annoying them — their game crashes to desktop frequently and they can’t play it. Most of the time they can’t find the cause for this.
If you are one of them, just check out the troubleshooting tips below. They have been proven by a lot of Monster Hunter: World users to be helpful for their crashing issue.
- Stop overclocking
- Turn off the overlay programs
- Switch to the borderless window mode
- Roll back or reinstall your graphics driver
1. Stop overclocking
Overclocked computer hardware may destabilize your system, so it’s more likely for you to experience game crash. If you’ve overclocked your CPU (or GPU), try reset its clock frequency settings to default. After that run your Monster Hunter: World and see if it runs smoothly.
2. Turn off the overlay programs
A lot of the times the overlay programs undermine the games stability. So when your game crashes, you should try turning off all these programs on your computer, including Steam Community Overlay, GeForce Experience, AMD User Experience Program, etc, and try starting it again.
3. Switch to the borderless window mode
Switching your game to the borderless window display mode helps you fix its crashing issue.
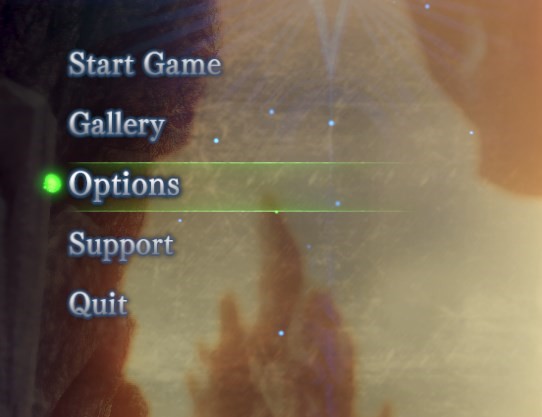
Step 1: On your game, select Options.
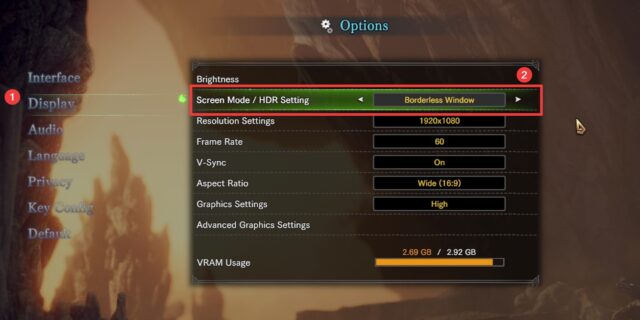
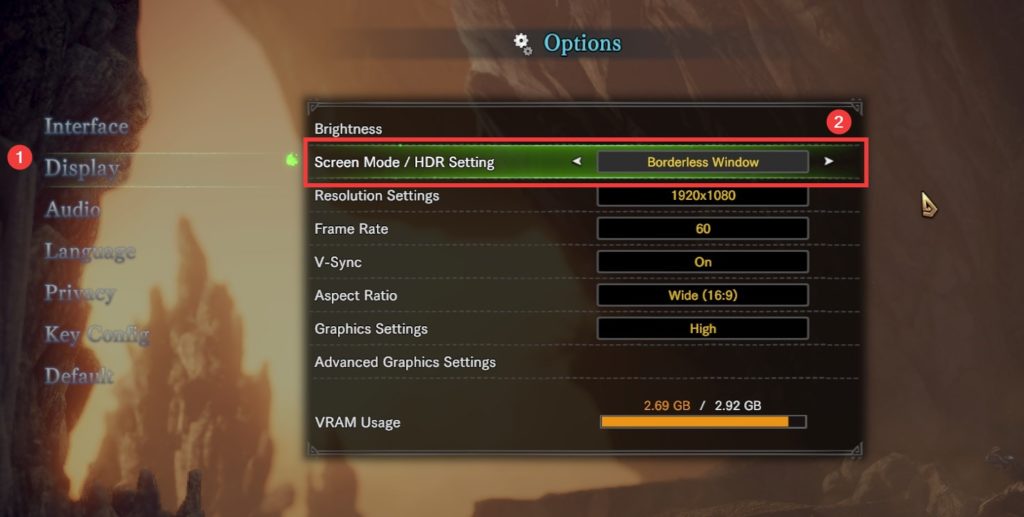
Step 2: Select Display, and then select Borderless Window for the Screen Mode setting.
Step 3: Play the game for some time and see if the crashing issue is fixed.
4. Roll back or reinstall your graphics driver
It’s also possible that your graphics driver is the cause of your Monster Hunter: World crashing on PC issue. And to fix it, you can roll back (restore to the previous version) or reinstall your graphics driver.
To roll back your graphics driver
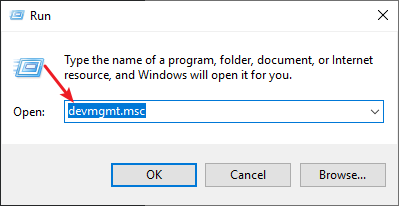
Step 1: Press the Win key and R on your keyboard at the same time, then enter “devmgmt.msc”.
Step 2: Double click your graphics adapter (under Display adapters).

Step 3: Select the Drivers tab, and then click the Roll Back Driver button.
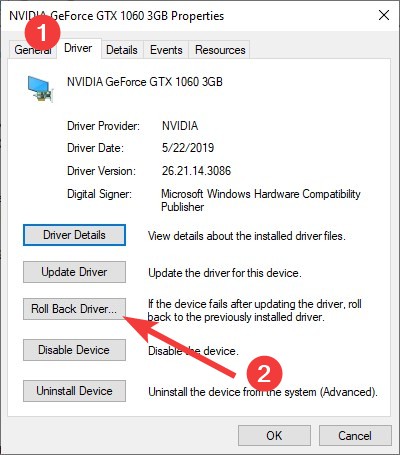
Step 4: Follow the instructions to roll back your graphics driver.
To reinstall your graphics driver
Step 1: Press the Win key and R on your keyboard at the same time, then enter “devmgmt.msc”.
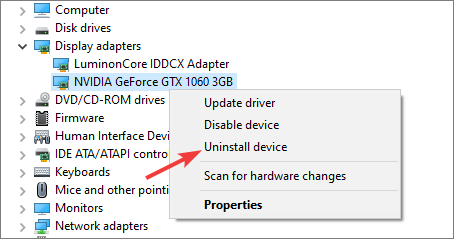
Step 2: Right click your graphics adapter (under Display adapters), then click Uninstall device.
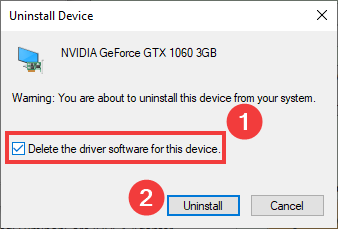
Step 3: Check “Delete the driver software for this device“, then click Uninstall.
Step 4: When the uninstallation has finished, go to your graphics adapter website, and download the graphics driver and install it on your computer.
Step 5: See if the not loading issue is gone. (If it isn’t, you can try uninstalling your graphics driver again by using Display Driver Uninstaller (DDU, a utility used for clean uninstalling your graphics driver). Then install the driver again on your computer.)
Has any of the troubleshooting tips above worked for you? Or do you have any other effective fixes? Tell us by leaving a comment below!