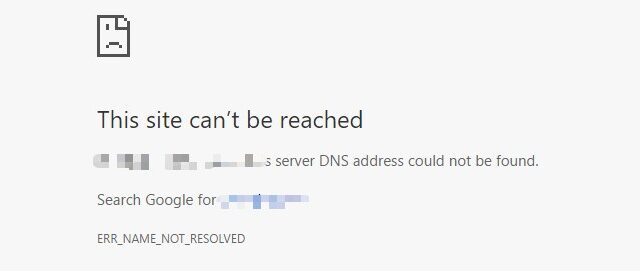
A lot of people have got an ERR_NAME_NOT_RESOLVED error on their web browser. This is usually a domain name resolution problem. If this error is also happening to you, check out the fixes below:
- Check your Internet connection
- Clear your browser history and cached files
- Flush your DNS
- Check your DNS settings
Fix 1: Check your Internet connection
You should see if your error is caused by an Internet connection issue. There are two things you need to do:
- Check your firewall or antivirus settings. Make sure your browser or the webpage is not blocked by your security software. Or temporarily disable it to see if this fixes your issue (be careful for what you’re browsing when doing so).
- Restart your computer and your router/modem. This can fix temporary connection issues that causes your ERR_NAME_NOT_RESOLVED error.
If these didn’t help, then move on to the fixes below.
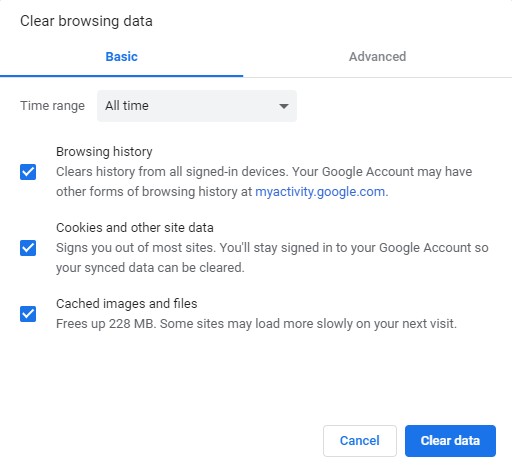
Fix 2: Clear your browser history and cached files
Your ERR_NAME_NOT_RESOLVED error is probably caused by your browser history and cached files. And to clear them:
Note: You’ll lose all your history and cached files. And some of your website settings will be reset.
- On your browser, press Ctrl + Shift + Delete.
- Set the time range to cover all your browser history, select all the items to clear, then clear these data.
Now refresh your problem webpage and see if your error is fixed.
Fix 3: Flush your DNS
Flush your DNS is helpful for fixing your ERR_NAME_NOT_RESOLVED error. To do so:
- Press Win + R on your keyboard.
- Type “cmd” and press Ctrl + Shift + Enter on your keyboard.
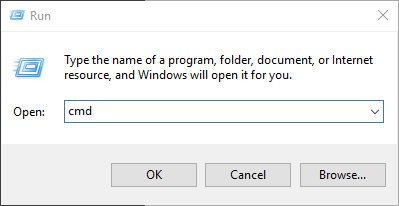
- Enter the following commands:
ipconfig /flushdns
ipconfig /renew
ipconfig /registerdns
- Close the window and restart your computer.
Now try reaching the problem webpage and see if your error is fixed.
Fix 4: Check your DNS settings
You’re probably having an issue with your DNS settings so you see the ERR_NAME_NOT_RESOLVED error. To check these settings:
- Press Win + R on your keyboard.
- Type “ncpa.cpl” and press Enter on your keyboard.
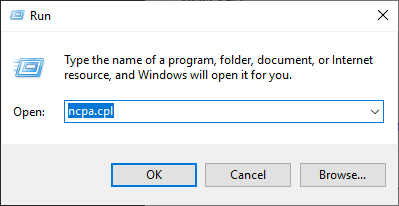
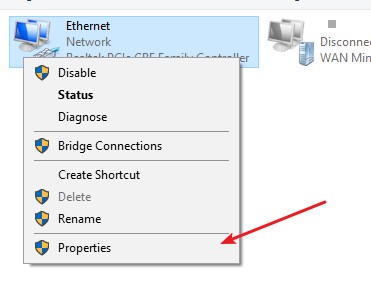
- Right click your network connection (“Ethernet” for wired connection, and “Wi-Fi” for wireless), and select Properties.
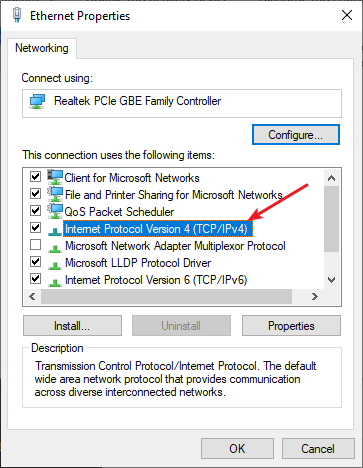
- Double click Internet Protocol Version 4(TCP/IPv4).
- Make sure Obtain an IP address automatically and Obtain DNS server address automatically are selected, then click OK. (If they already are then skip this step and go to step 7.)
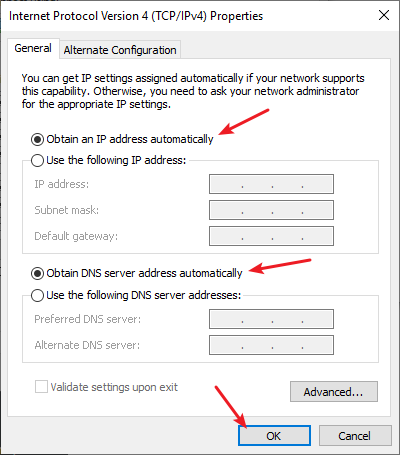
- Check if this fixes your error. If not move on to the step below.
- Select Use the following DNS server addresses, then set the server addresses to the Google public DNS server addresses (8.8.8.8 / 8.8.4.4).
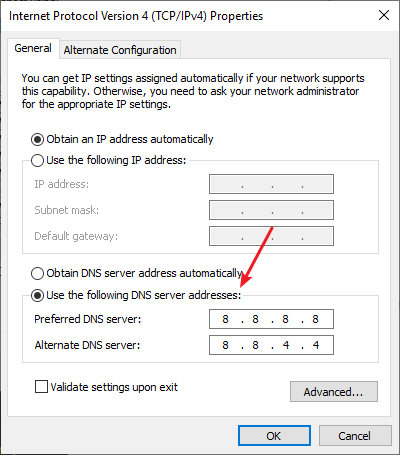
- Click OK and see if this fixes your error.
If none of the fixes above works for you, then you may need to contact your ISP for advice.