The backspace key on your keyboard is not working properly? This is an issue that a lot of people have experienced. But don’t worry! There are effective ways to fix this issue. The following is a list of solutions to the backspace not working issue. Just take a look at them now!
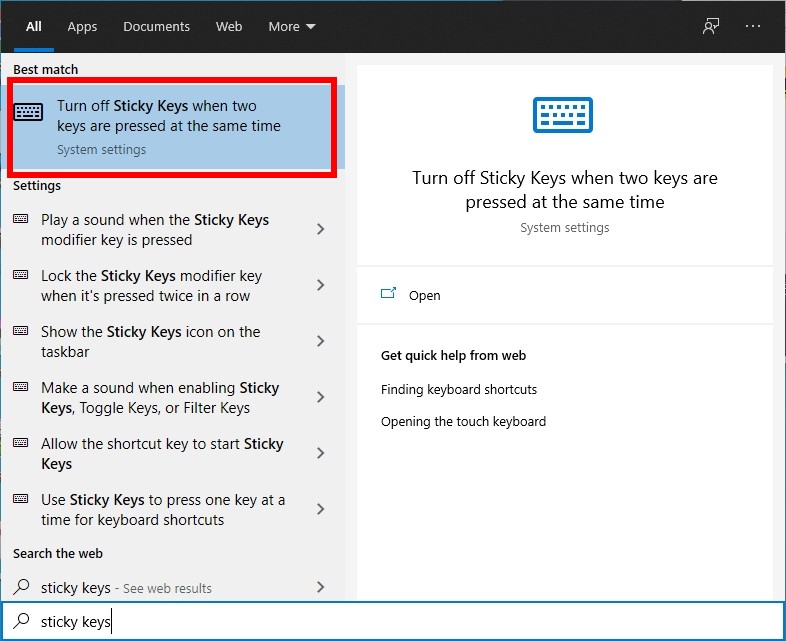
Turn off sticky keys
Step 1: Press the Win key on your keyboard.
Step 2: Type “sticky keys” and select Turn off Sticky Keys… in the results.
Step 3: Turn off Use Sticky Keys.
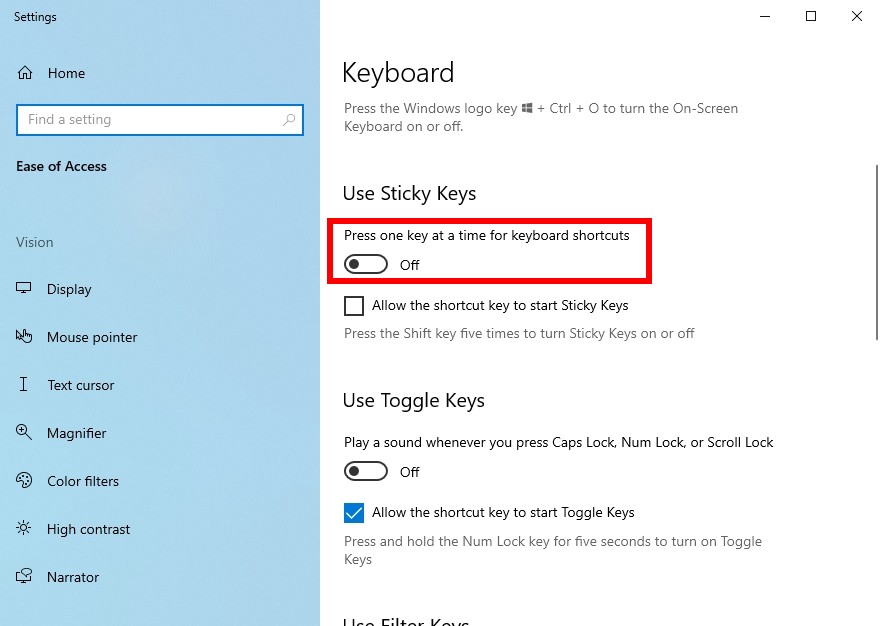
Step 4: Restart your computer and test your backspace not working issue.
Run the Hardware and Devices troubleshooter
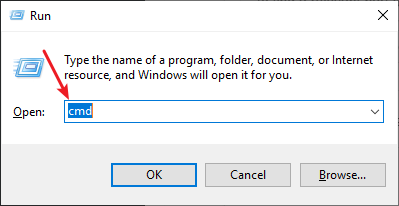
Step 1: Press the Win and R keys on your keyboard
Step 2: Type “cmd“, then press Ctrl, Shift and Enter to open Command Prompt as administrator.
Step 3: Enter the following command:
msdt.exe/id devicediagnostic
Step 4: Follow the instructions to run the troubleshooter for your devices
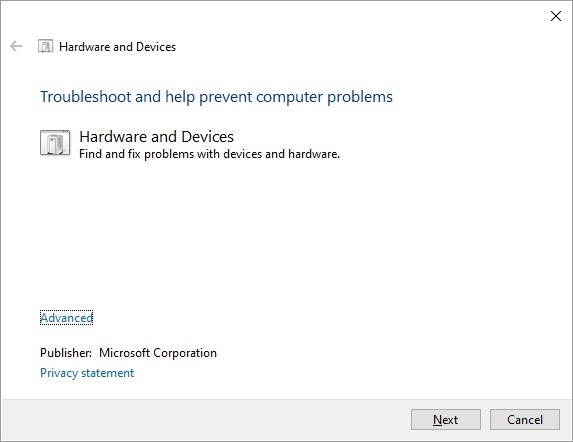
Step 5: Test to see if this fixes your backspace not working issue.
Reinstall your USB device
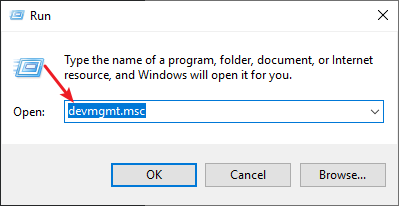
Step 1: Press the Win and R keys on your keyboard, then enter “devmgmt.msc“.
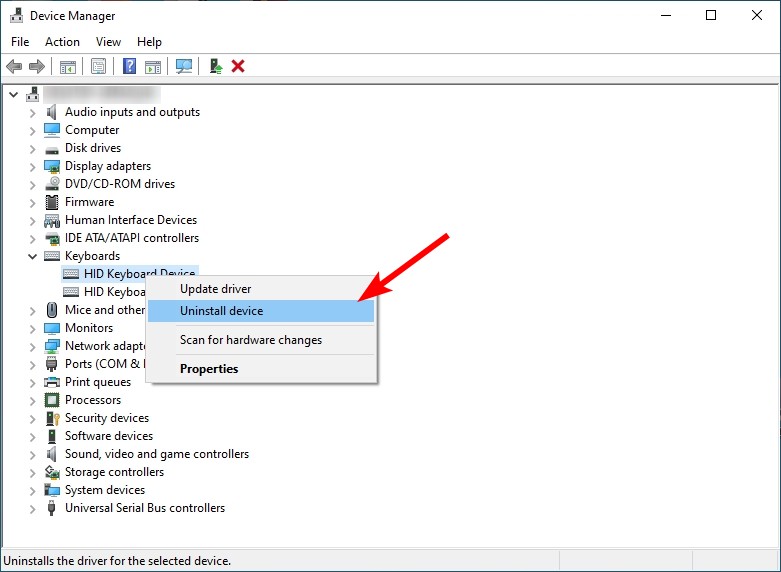
Step 2: Double click Keyboards, right click your keyboard and select Uninstall device.
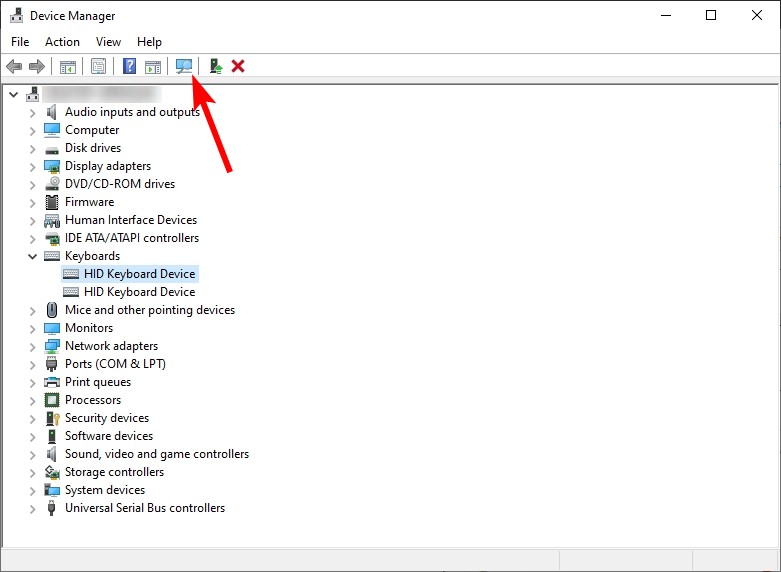
Step 3: Click Scan for hardware changes to reinstall your keyboard.
Step 4: Test to see if this repairs your backspace key.
Has any of the fixes above worked for you? Or do you have any other effective solutions? Tell us by leaving a comment below!