
The “ERR_NAME_RESOLUTION_FAILED” error is a very common error on the Google Chrome browser. Many Chrome users have seen this error. If you’re also one of them, don’t worry. The following are the fixes that can help you fix it:
Fix 1: Check your Internet connection
You should see if your browser error is caused by an Internet connection issue. There are two things you need to do:
- Check your firewall or antivirus settings. Make sure your browser or the webpage is not blocked by your security software. Or temporarily disable it to see if this fixes your issue (be careful for what you’re browsing when doing so).
- Restart your computer and your router/modem. This can fix temporary connection issues that causes your ERR_NAME_RESOLUTION_FAILED error.
If these didn’t help, then move on to the fixes below.
Fix 2: Flush your DNS
In many cases, the ERR_NAME_RESOLUTION_FAILED error is caused by DNS issues. Flush your DNS is a good fix to try. To do so:
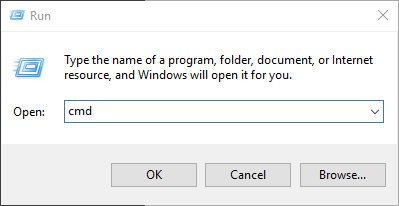
- Press Win + R on your keyboard.
- Type “cmd” and press Ctrl + Shift + Enter on your keyboard.
- Enter the following commands:
ipconfig /flushdns
ipconfig /renew
ipconfig /registerdns
- Close the window and restart your computer.
Now try reaching the problem webpage and see if your error is fixed.
Fix 3: Check your DNS settings
Another effective way to troubleshoot the ERR_NAME_RESOLUTION_FAILED error, which is usually caused by DNS issues, is to check your DNS settings:
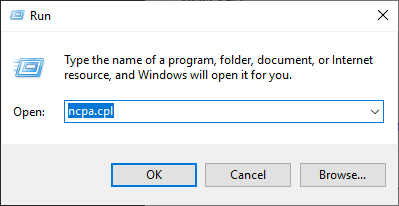
- Press Win + R on your keyboard.
- Type “ncpa.cpl” and press Enter on your keyboard.
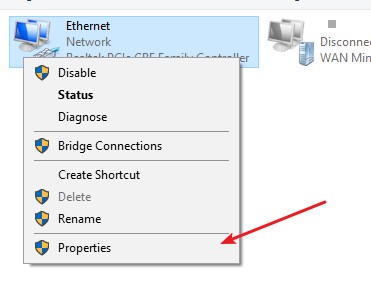
- Right click your network connection (“Ethernet” for wired connection, and “Wi-Fi” for wireless), and select Properties.
- Double click Internet Protocol Version 4(TCP/IPv4).
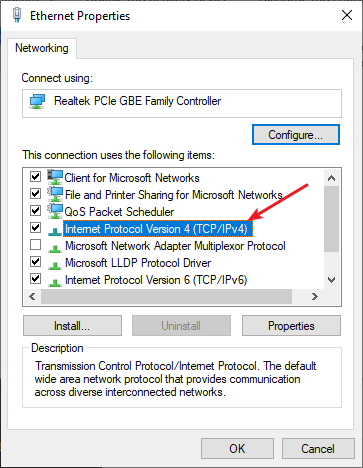
- Make sure Obtain an IP address automatically and Obtain DNS server address automatically are selected, then click OK. (If they already are then skip this step and go to step 7.)
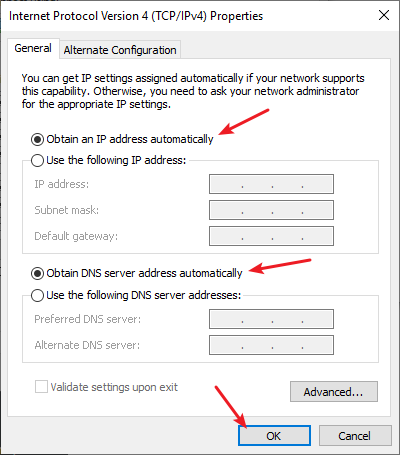
- Check if this fixes your error. If not move on to the step below.
- Select Use the following DNS server addresses, then set the server addresses to the Google public DNS server addresses (8.8.8.8 / 8.8.4.4).
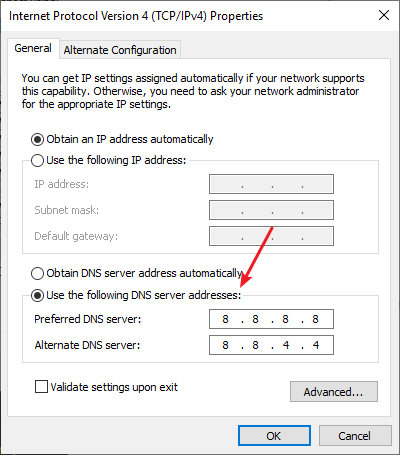
- Click OK and see if this fixes your error.
Did one of these fixes help you resolve your problem? Let us know by leaving a comment below!