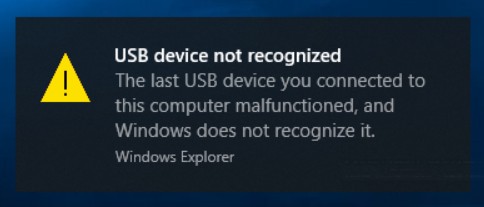
Usually when you plug your USB device to your Windows 10 computer, your system will detect this device automatically and you should be able to use it in a moment. But things don’t work like this from time to time. For a lot of Windows 10 users, they see a USB device not recognized error when they are trying to use their device.
But fortunately, there has been some effective fixes for this error. In this post, we have compiled a list of these fixes, which you can take a look below.
Restart your computer
This is the first thing you should try. Disconnect your USB device from your computer first, and then restart your computer. After that, connect the device back to your computer again and see if you’re able to use it.
Connect your USB device to another computer
This has been reported by a lot of people that can fix the USB device not recognized error. To do this:
Step 1: Connect your USB device to another Windows computer.
Step 2: Wait until it is installed on that computer and works properly.
Step 3: Disconnect it from that computer and connect it back to your own.
Now check to see if this resolves your USB device not recognized problem.
Turn off power management for USB Root Hub
Perhaps your USB device has been turned off because of power management. To fix this:
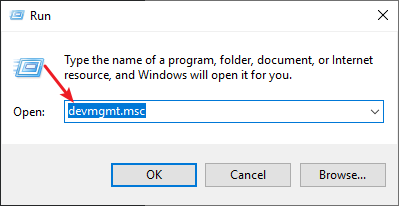
Step 1: Press the Win and R keys on your keyboard, then enter “devmgmt.msc“.
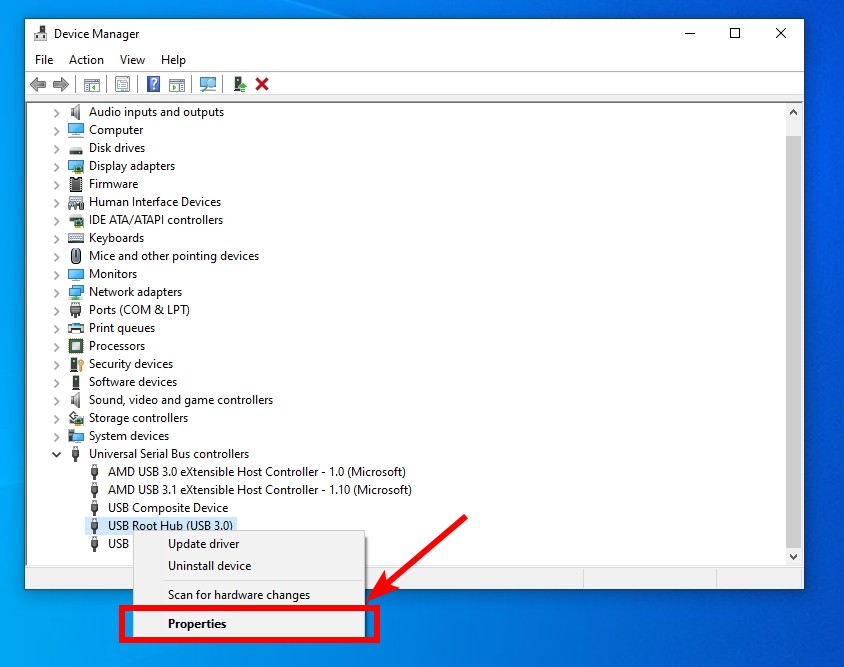
Step 2: Right click USB Root Hub (under Universal Serial Bus controllers) and select Properties.
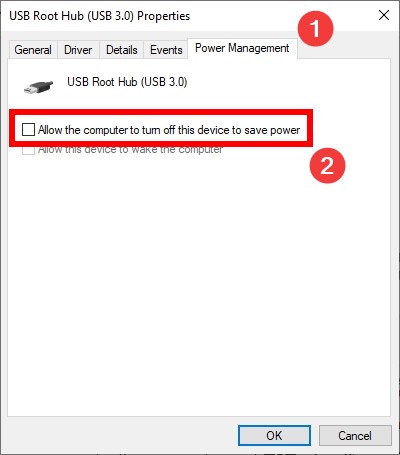
Step 3: Select the Power Management tab and uncheck Allow the computer to turn off this device to save power.
Step 4: Click OK.
Step 5: Do the steps above for all the other USB Root Hub devices.
Step 6: Restart your computer and then see if it is now able to recognize your USB device.
Change your system power plan
Try changing your power plan to the highest one. This can sometimes fix the USB device not recognized error. To do this:
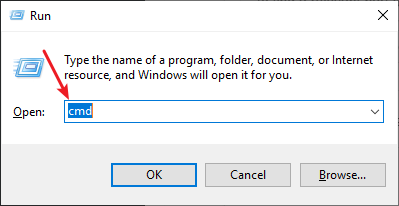
Step 1: Press the Win and R keys on your keyboard
Step 2: Type “cmd“, then press Ctrl, Shift and Enter to open Command Prompt as administrator.
Step 3: Enter the following command:
powercfg -duplicatescheme e9a42b02-d5df-448d-aa00-03f14749eb61
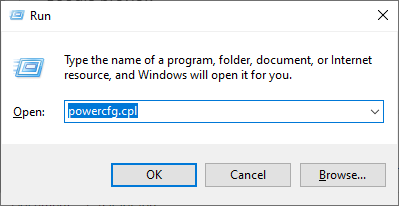
Step 4: Press the Win and R keys on your keyboard
Step 5: Type “powercfg.cpl“, then press Enter.
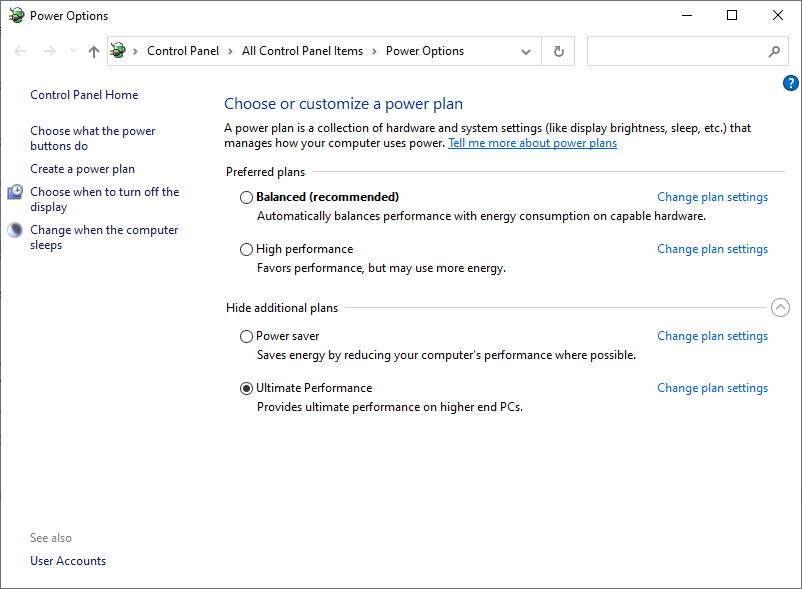
Step 6: Now you should see the Ultimate Peformance plan. Select it to enable this plan.
Step 7: Check to see if this fixes your USB issue.
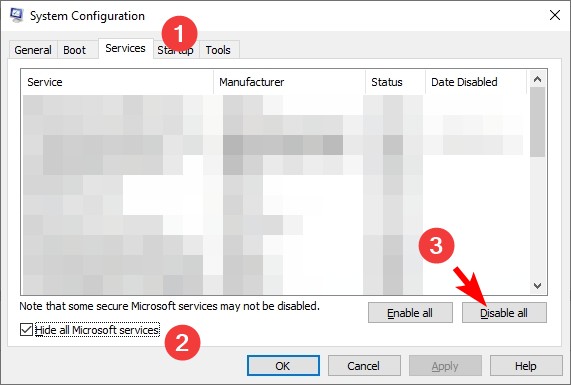
Check the services running on your Windows system
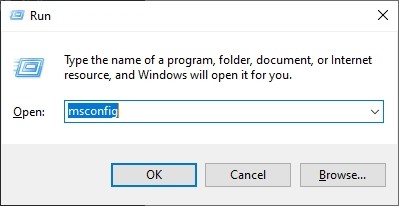
Step 1: Press Win + R on your keyboard, then enter “msconfig“.
Step 2: Select the Services tab. Check Hide all Microsoft services. And then click Disable all.
Step 3: Click OK, and restart your computer. Then see if the USB not recognized error is gone.
Step 4: If it is, then start the services you just disabled one by one to test your issue, until you find the one that is really causing the error.