Trying to record your laptop screen? There are several ways to do this. Here we have compiled a list of effective ways to record screen on your laptop, to use system built-in utilities or third-party programs. Take a look at it below!
Record with ShareX
ShareX is an screenshot program that works only on Windows computers. More than taking a still screenshot, it can also record your laptop screen as animated images. Here is how:
- Download ShareX and install it on your laptop.
- Open ShareX.
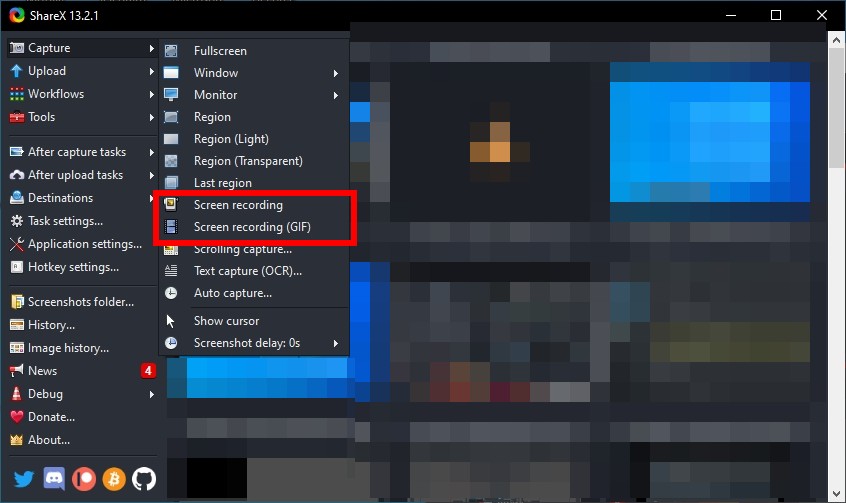
- Select Capture > Screen recording (to record as a video) or Screen recording (GIF) (to record as a GIF image).
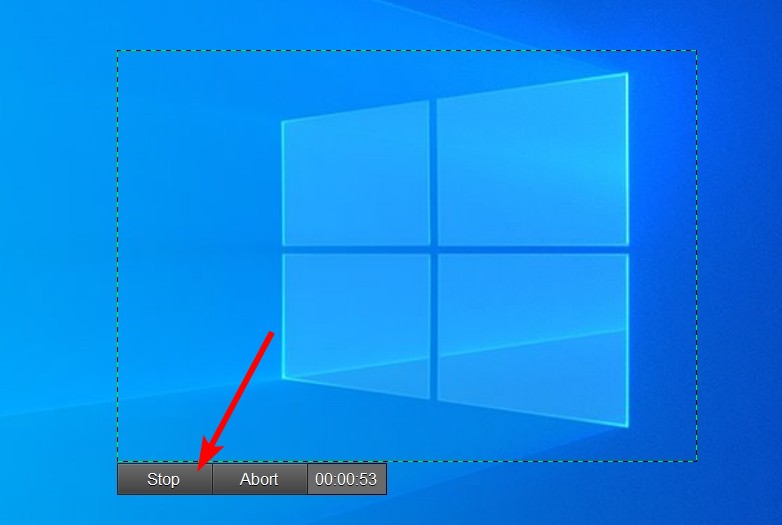
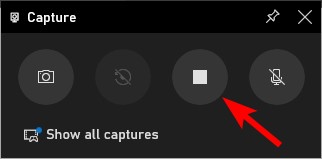
- Click and drag to select the area to capture and release your mouse button to start recording.
- Click the Stop button to stop the recording and save it on your computer.
Now you can view and edit your screen recording in the ShareX main window.
Record with Game Bar on Windows 10
Game Bar is a Windows 10 built-in utility with widgets for screen capture and sharing. It allows you to record programs running on your laptop. Note that you can’t use it to record your desktop or File Explorer.
To use this tool:
- Press the Windows log key and R on your keyboard at the same time. This will launch the Game Bar utility on your Windows 10 system.
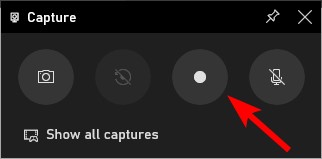
- Click the Record button to start recording your screen.
- If you want to stop the recording, click the Stop button.
It will automatically save your screen recordings on your laptop. If you want to find these recordings, here is how:
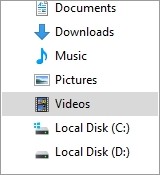
- Press the Windows log key and E on your keyboard at the same time. This will open File Explorer.
- On File Explorer, click Videos.
- Double click the Captures folder.
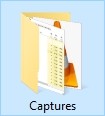
You should see your screen recordings there.
Record with the Screenshot toolbar on macOS
If you’re on a MacBook, use the Screenshot toolbar to record your screen:
- Press Shift, Command + 5 keys on your MacBook keyboard.
- Click the entire screen icon to capture the whole screen, or click the selected portion icon and click and drag to select the area you want.
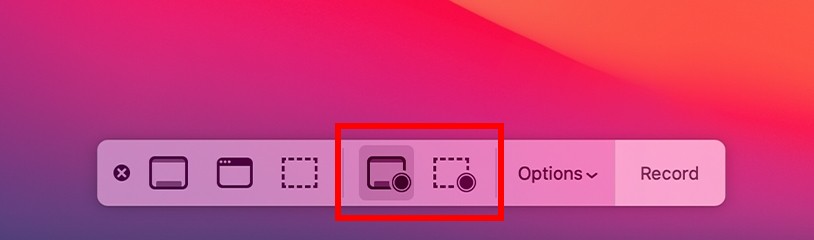
- Click the Record button to start recording.
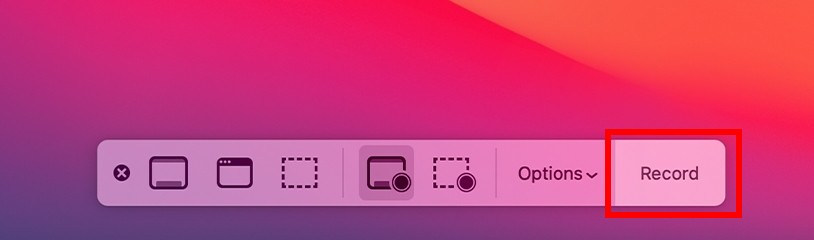
- To stop recording, click the Stop icon in the menu bar (at the top of the screen).
Has any of the ways above worked for you? Or do you have any other better ways to record your laptop screen? Tell us by leaving a comment below!